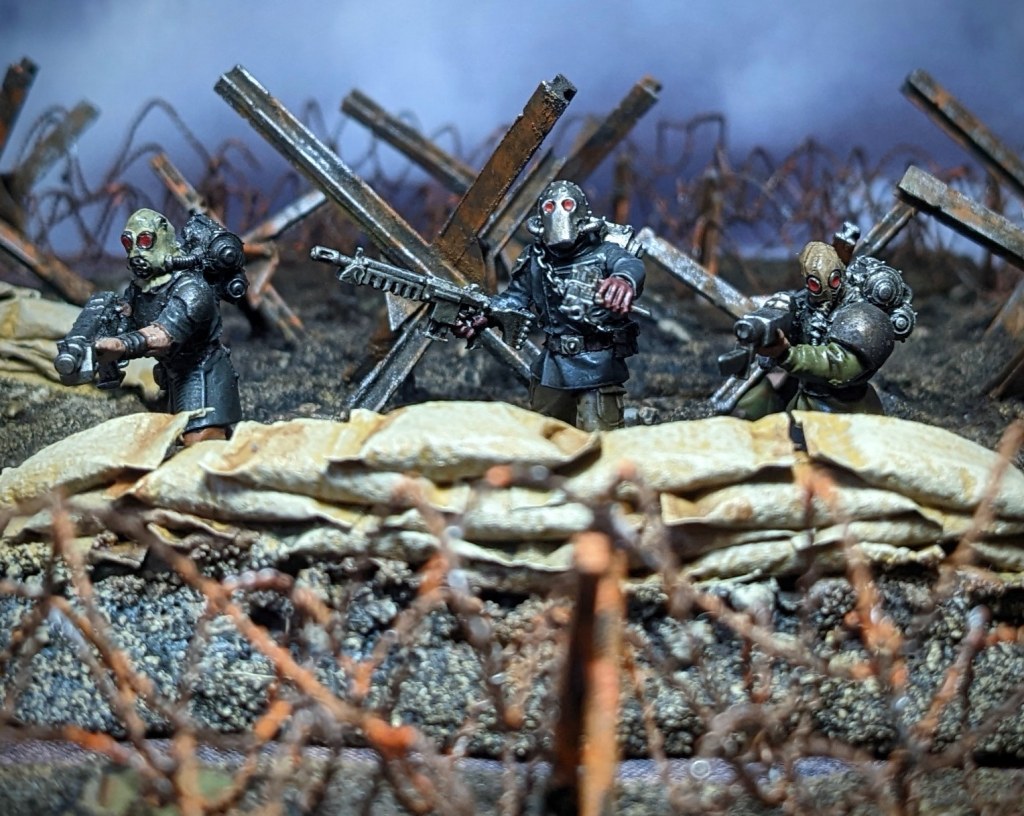
Dicing with Death – War on Eryndor V

Esteemed Lord-Marshall, you asked me to prepare a dossier on the ongoing war on Eryndor V in the Ansham System. I have provided several sources below, but the overall tactical summary is that the strategic position has become more complicated, with forces from several legions now engaged on the planet. Given the importance of the planet’s promethium refineries, I can only predict further fighting and recommend the commitment of as much resources as you have spare.

Missive from Primus-Strategos Blazaar Dymov to Lord-Marshall Octavian II

Siege of Utrej-sak-Kherjak

The following is a secure message from the Horusian forces intercepted by vox-thief:

Planetfall M31.02001
Designation Utrej-sak-Kherjak, sub-set outta region and southern hemisphere of Eryndor V – Primary debrief of the Brotherhood of the Dawn Sky.

  • Key objective(s) – To secure imperial dramatis personae and extrapolate defence protocols for the sector.
  • Secondary objective – Assassinate Cato Valeranius – Ultramarines Captain of the 77th Company.
  • Tertiary objective- Null and void, dismissed infantry expendable as decreed by the Kharash under guise of the false Great Khan.

Hibou Khan led the task force setting out advance positions under the cover of darkness.

Initial pulmonary deathshot removing the heavy support squad sergeant by a calculated Vindicare snipeer. Remaining members take cover and minimal losses recorded (squad not pinned).

Ebon Keshig edged a flank on Praetorians, Contemptor and the opposing Warlord only to be quashed within -09.6 parsecs … Enacting an honourable death!

The trap sprung and the Ultramarines surrounded by deep striking assault marines, hailing bolt rounds, stood their ground in a tactical pear. Spearing a careful spread of consolidated fire from several units resulting in a massacre from self detonating and interconnecting propane.

The Ultramarines continued to press forwards, pressing the White Scars to their drop zone as dawn approached. The counter offensive was short lived as Cato Valeranius with his personal Suzerain cohort engaged Khan and his personal guard.

In a dual of skill, and exquisite blade against material defence, Khan delivered a murderous strike by kink under Cato’s left pauldron. A sigh of derision as Cato spun on his heel, dropped to one knee and passed seniority to Champion Cordos.

Seeing their commander fall but not embarred, the Ultramarines secured the extraction of 2 of 3 Expeditionary Fleet Logistic Officers and made way to regroup with the Raven Guard task force in the Northern Hemishere.

A successful Ultramarines defence and counter offensive…classic indicator of The Logos Lectora

+++ Tactical reticule – Intercepted +++
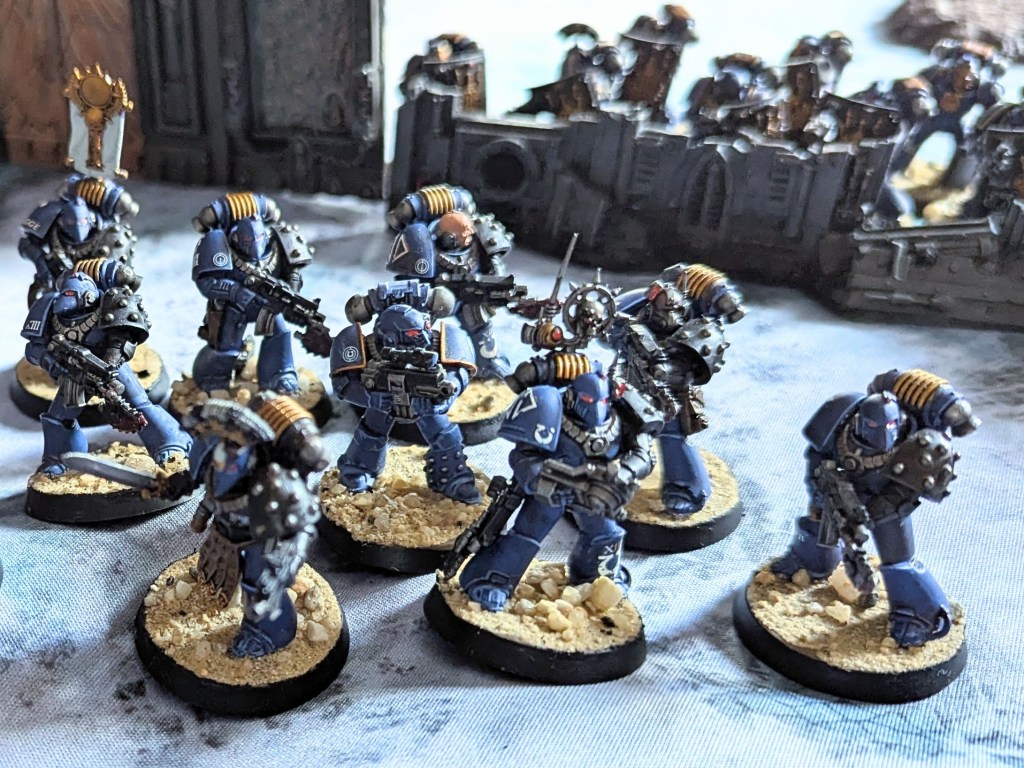
This report is from a stand in command Sergeant Octavius Tibon of the first squad, 77th Company and you’ll find out later in the report why Captain Cato Valerianus is not present.
It’s been many months on the world of Eryndor V and many more digging in to defend the city of Utrej-sak-Kherjak.
Me and brothers of the 77th company deployed for battle to defend the city and in recent weeks victory’s have been hard to find here for us loyalists.
Our orders were to find lost command structure of the 216th Expeditionary Fleet in the part of the city we lost ground in previous weeks gone by. They were scattered amongst the ruins of the ruined city landscape.
We set up ready for the counter attack heavier on the flanks, with two rhinos, one filled with tactical squad and the other filled with nemesis marines on the left and on our right flank we positioned our land raider with Cato Valerianus and his command squad of Invictarus Suzerain, accompanied by apothecary Maevius Tigo and a squad of praetorians on foot supported by a contemptor dreadnought.
Our centre was protected by a squad of 5 man heavy weapons team all with lascannons and a breacher squad who locked shields ready to hold the centre.
The enemy who we fought were the traitor sons of the khan and they made the first move…..

Keshig took their left flank and went straight for a building to hide like the cowards they are and then charged the praetorians and nearly saw them off of it wasn’t for the contemptor coming to their aid and help secure their designated objective.
One rhino was destroyed from a hail of fire from the scars autocannon squad at the back but luckily the squad had got out and secured the central objective.
The central breacher squad was jumped upon and stabbed in the back by the scars jump troops and the breacher squad was cut to ribbons, but they were revenged by working together to bring them down and force them to run away.

Then came the final fight Cato Valerianus charged head long into the fight straight for Hibou Khan, but alas the Khan was too skilled and struck the final blow under Cato’s left pauldron and his Invictarus Suzerain squad died to the last to protect their captains body.
Even with that dreaded blow the sons of Ultramar prevailed and held majority of the objectives and secured the majority of the lost command structure.

Courage and Honour
Long live the EMPEROR

War for the fuel
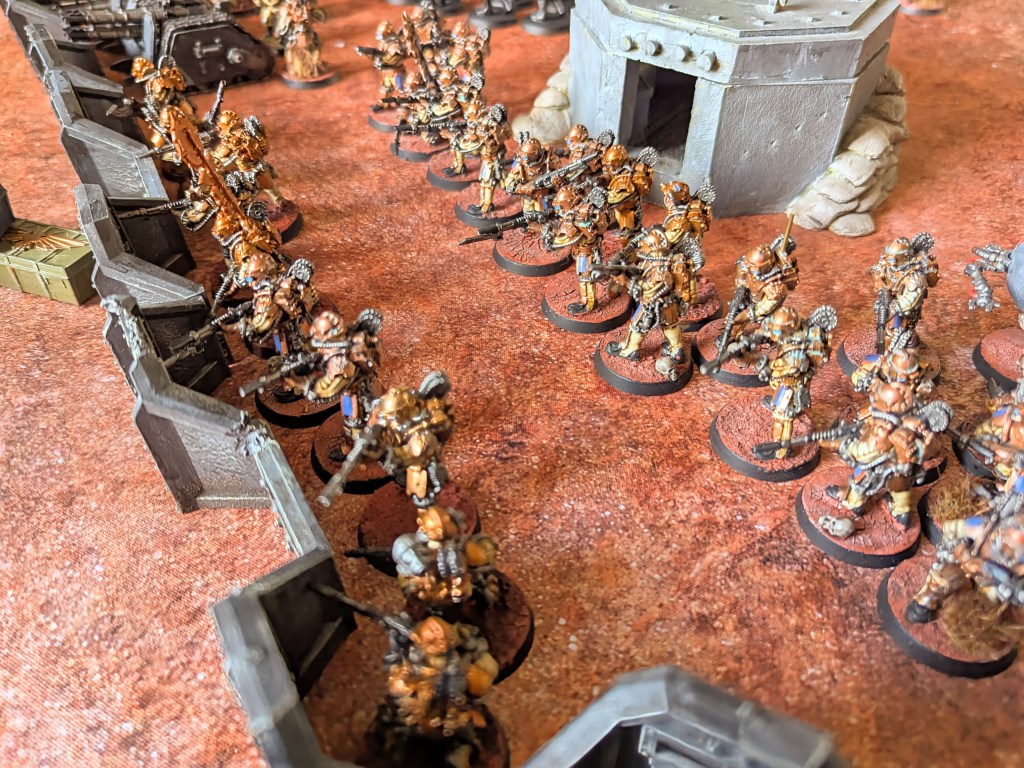
Report from the EFIC Interrogator Fgrei:

18h31. Interrogation commences on Prisoner 46.

23h59. Prisoner 46 resistant to initial interrogation. Advanced interrogation commencing.

04h42. Prisoner 46, confirmed as a member of the inner circle of the enemy force assaulting the EFLC Corps Supply Point Khajmuul, finally spoke.  [extra-interrogation note: the suspect used the term Esharu to refer to the enemy force]

The prisoner was told that the goal was to retake Khajmuul to gain access to the considerable promethium supplies in the depot. However he also overheard radio chatter with an unknown marine overlord who suggested that in fact the Esaru were used to draw marine elements away from Utrej-sak-Kherjak to aid in the decapitation strike attempt against the loyalist high command.

04h49. Prisoner 46 has died. Interrogation room cleared.

05h00. Interrogation commences on Prisoner 47.

Shadow-Captain Kraai. 8th Talon. Combat Log. M31.02001

Traitors assaulted the fuel depot.

Astartes presence was nil.

XIX assets deployed to counter the assault. Total success.

Enemies worthy of challenge, none.
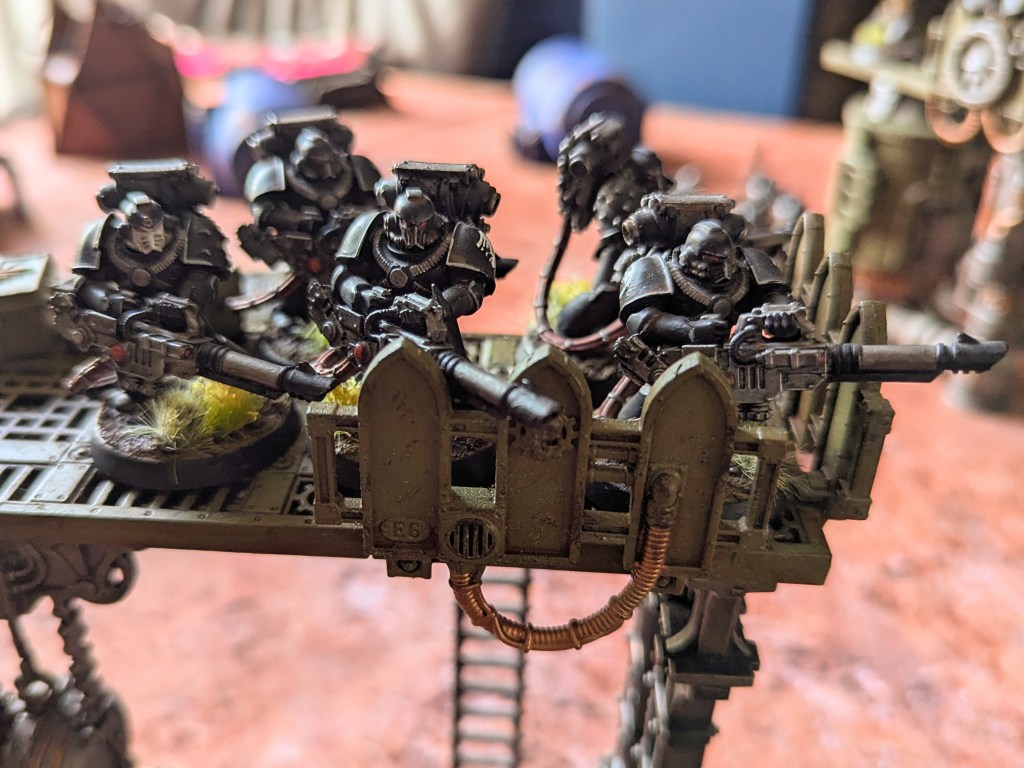
Report from Mechanicum Adept O-Lëph:

Promethium assessment:

  • Total barrels lost: 22,411
  • Total barrels remaining: 4,563,999

Structural integrity: All major tanks are fully operational, one suffered minor damage but Omnissial blessings returned it to full capacity.

Biological remains: Substantial, 8,932 human wounded deemed adequate for thrall conversion.

Overall assessment: Acceptable.

01000010 01101100 01100101 01110011 01110011 01101001 01101110 01100111 01110011 00100000 01100110 01110010 01101111 01101101 00100000 01110100 01101000 01100101 00100000 01001111 01101101 01101110 01101001 01110011 01110011 01101001 01100001 01101000 00100000 01100001 01101110 01100100 00100000 01101000 01101001 01110011 00100000 01110011 01100001 01100011 01110010 01100101 01100100 00100000 01010000 01110010 01101111 01101101 01100101 01110100 01101000 01101001 01110101 01101101

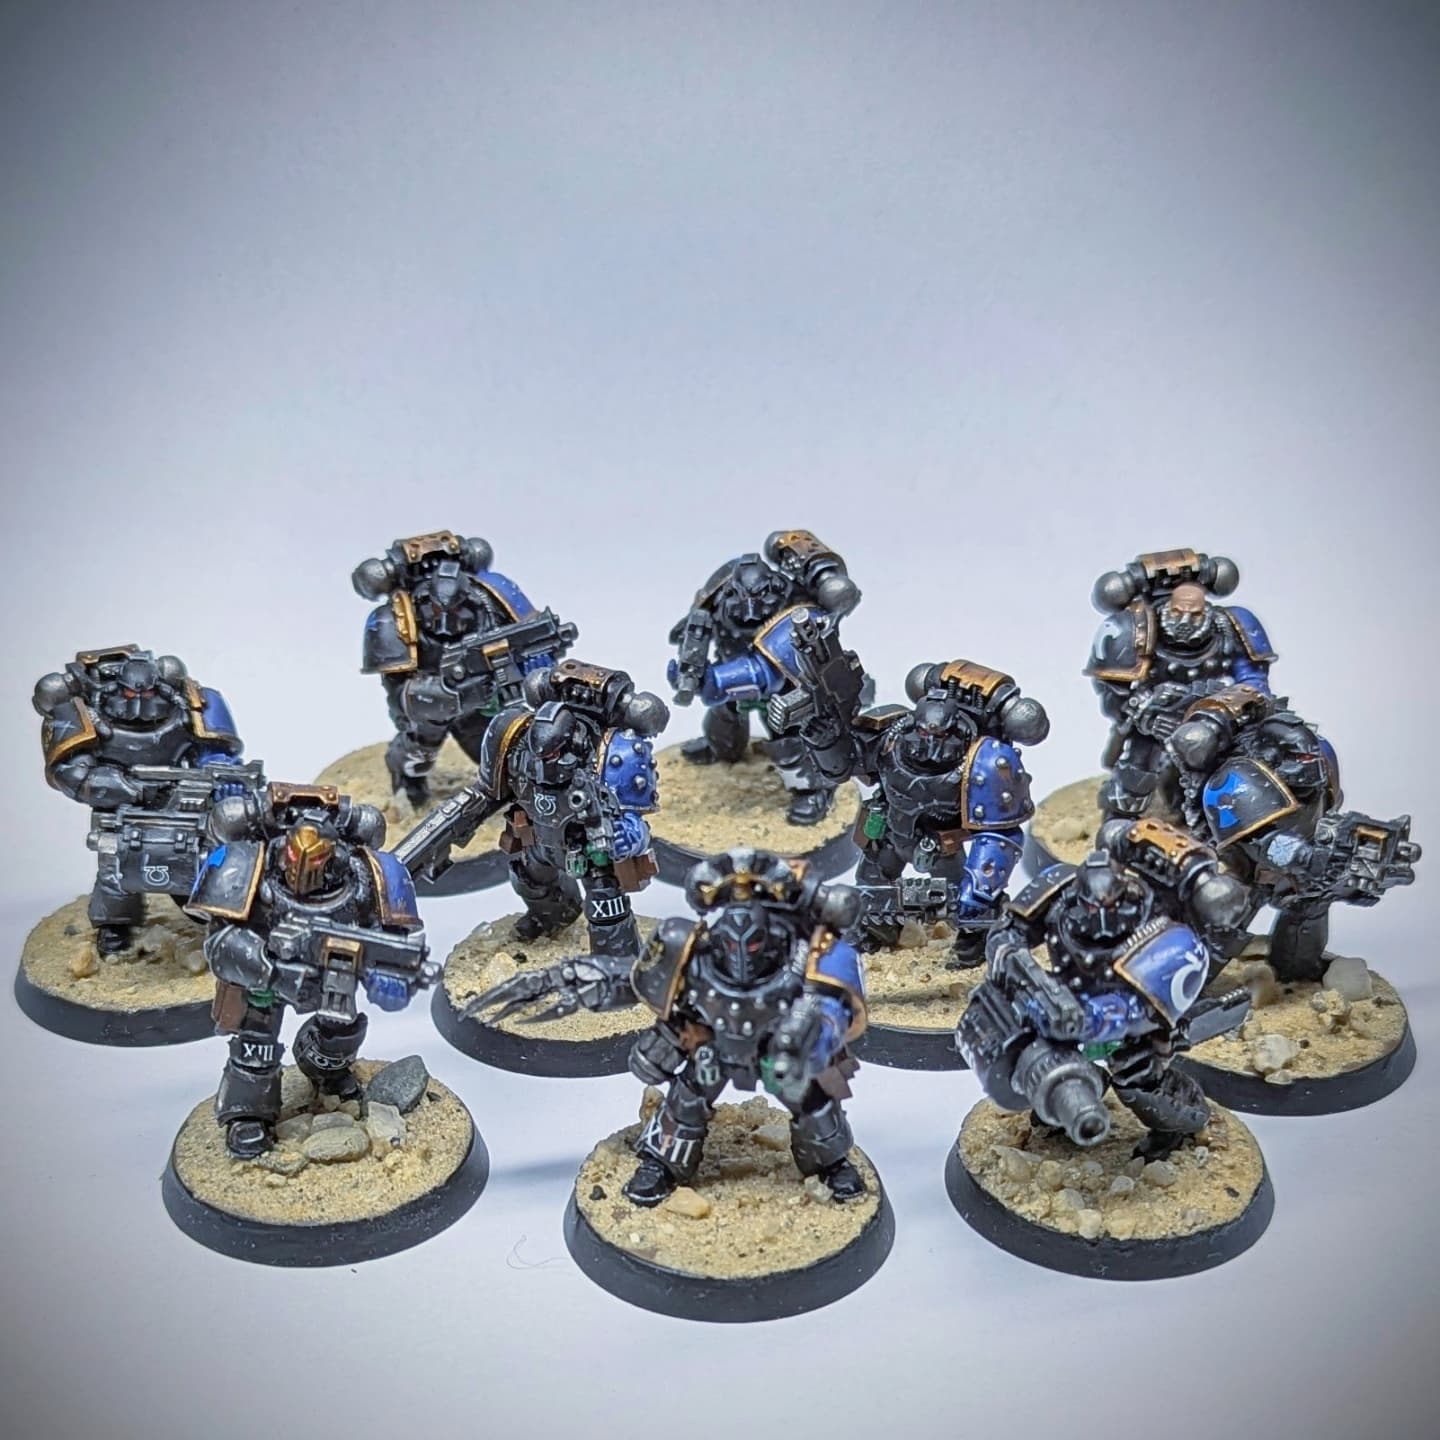
Dok’s Shop – Ultramarines Nemesis Destroyers

“Our recon forces have confirmed the Fleet’s intelligence report. Lorgar is here.”


The room stilled at this dire news and all bar one of the assembled Ultramarine officers were silent. Sergeant Taius Macrian’s pacing continued unaffected, his fists clenching so hard his suit’s servos were straining under the effort.


“Well what is there to discuss? We are here, we attack.” he stated gruffly through his vox grill. No one else wore their helmet to the briefing, but Macrian had not been seen without his in some while.


“Consider the practical Taius”, Arrias responded, attempting to soothe the choler in his battle-brother, “assaulting a primarch’s force head on without a plan is suicide.”


“What does that matter? We are all on borrowed time as it is, and we owe a debt for our absence on Calth. Spend your time discussing plans Arrias, I will see you planetside standing on that traitor’s corpse, or you will add my name to the roll of honoured dead in this ship. I care not either way.”

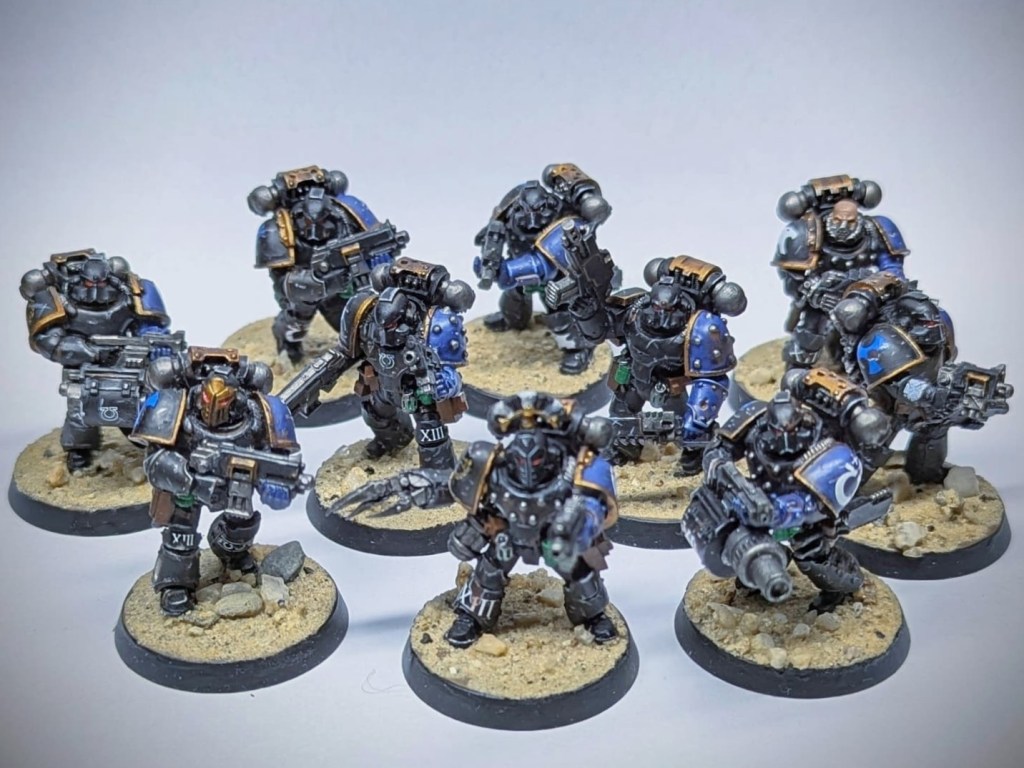
When the rules for Nemesis Destroyers were released, I knew they would fit in perfectly with my Ultramarines army. The rules are cool, I love the idea of the harrower bolters being a true Ultramarine approach to destroyers. Also it would let me give Tom a taste of his own medicine when I utilise chemical warfare against his Raven Guard destroyer company!

Squad Macrian of the Ultramarines 7th Chapter, 7th Company, known as the Black Consuls

Making the models

As there are no official models for the Nemesis Destroyers, it meant my favourite thing – conversion time! Fortunately the process for this was straightforward: use the existing Destroyer models as a base and add bolter arms from my bits box.

You can see that I used a combination of plastic and resin bits to upgrade the regular destroyer kit and ensure they all had bolters.

As a result of this scrounging the arms are a mix of heresy mark 3 and 4 arms along with some 40k Death Guard pieces with different types of bolters thrown in as well. Whilst initially unintended, I love how this looks and it fits into the fluff for this unit. The squad draws marines from across the whole company and are only focused on being battle-ready. As such they are more than willing to scrounge replacement parts wherever necessary.

Painting

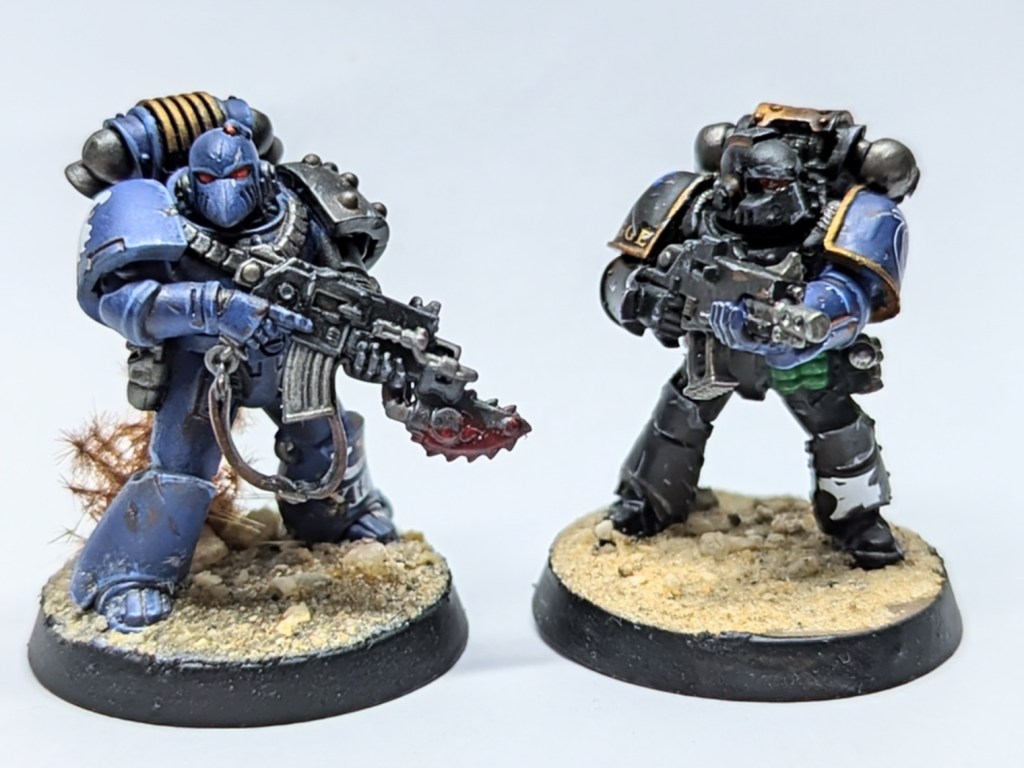
When it came to painting I knew they should have black armour. Not only does this reflect the depictions of destroyers in the various Forge World books (including the nemesis chapter themselves), but also ties really nicely with the fluff for my force. This is because all my marines have some part of their blue armour painted black – for them it is a sign of mourning as they were absent from Calth during the betrayal. The company sees this absence as a mark of dishonour and wear black for their shame. I had the idea that this squad was made-up of those particularly forlorn marines, those most broken by betrayal and most consumed by vengeance. This means they are less usable from a tactical perspective, and instead are used as a hammer by Arrias Cordos, the company commander, where more subtle approaches are not needed.

Two of the completed models showing off their battle damage!

The paint scheme itself was simple, being a mirror of my usual Ultramarine scheme (which is mainly blue but with a black arm) so that the destroyers were mainly black but with a blue arm. I had a go at adding extra battle damage to the models, both to show that they are in the thick of the fighting but also their attitude to their armour – they do not care how they look, only that they can fight.

This shows how the Nemesis Destroyers’ scheme is a mirror of my regular Ultramarines scheme. Whilst they are visually distinct, they are still tied together by a common style.

I will admit that I did not particularly enjoy painting these models until right at the end. I was not particularly motivated to paint them and so they sat for ages in a half finished state. Once I started weathering them I felt the models really come together and now I’m super happy with them – I just needed a bit of a push to get them over the line.

I’ve yet to get them on the tabletop, but fingers crossed I can get them into battle and see how they do! With leadership being less of a guarantee in this edition, maybe they’ll prove extra devastating…

Dok’s Shop – Lucifer Blacks

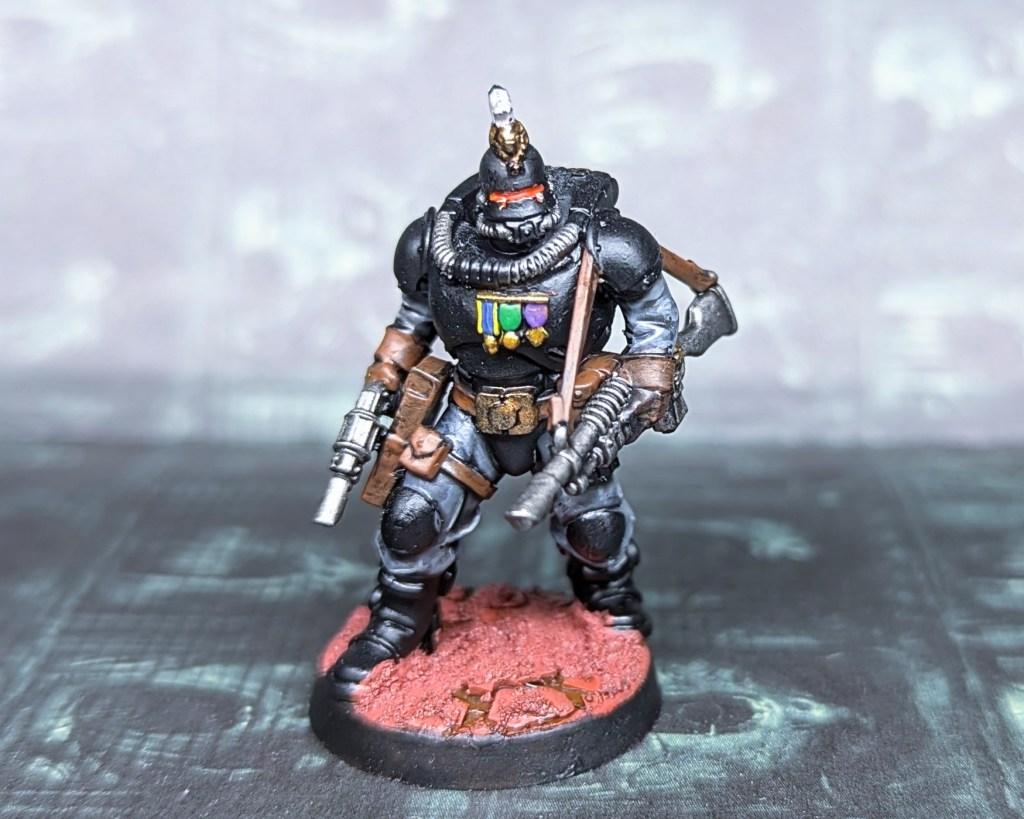
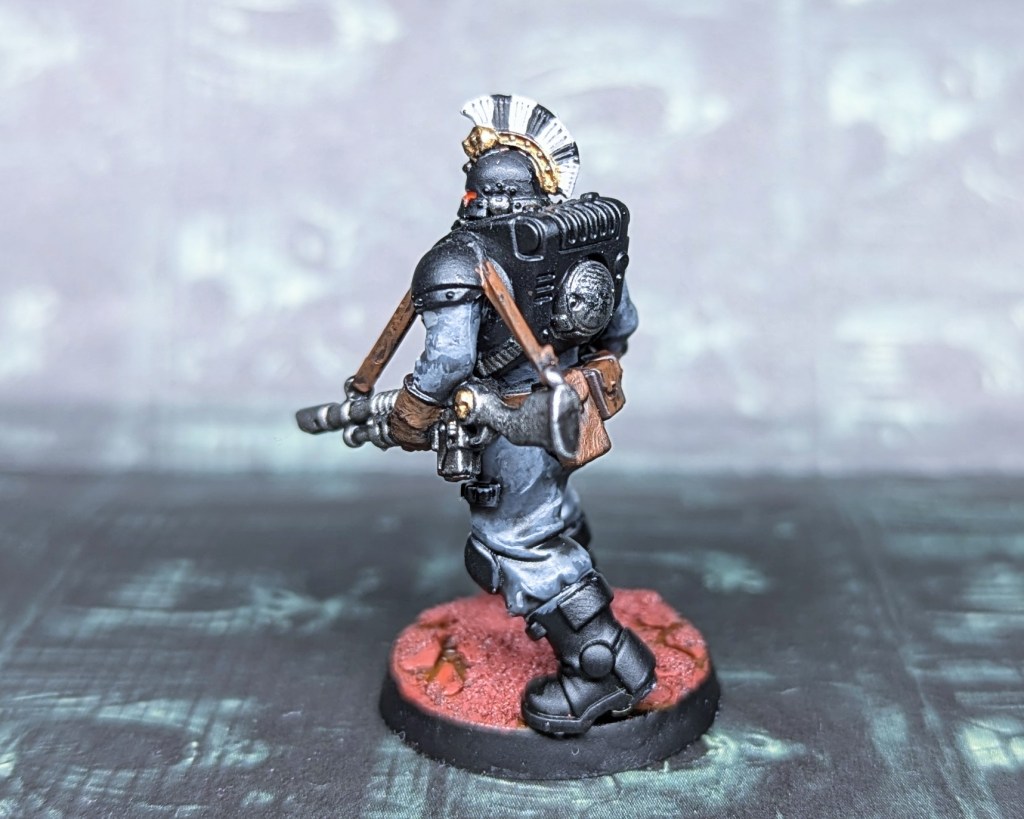
Hi everyone, I’ve been picking up GW’s monthly minis for a while now, converting them into different Militia units, such as the 710th Ironbacks. When the scout model was announced I thought it would make a good ‘elite’ unit with carapace armour.

Concept

I then thought it would be fun to model up a Lucifer Black. Being an elite unit that, by the Great Crusade, only operated as bodyguards to important Imperial officials, I thought it would be fun to include one in my Solar Command Squad. That way it meant I can use the model in game (most of the others sit on my display case) but would also add some fluff to my Lord Marshall – he is important (or politically connected) enough to warrant the extra protection.

Plan

So, with this idea, I went to the source material, flicking through my well-thumbed copy of Dan Abnett’s Legion.

Whilst they are described as wearing greatcoats (which the scout model is not), I figured that this could be explained by different environments and this more of a functional “battle gear” rather than ceremonial. I figured that this Lucifer Black is wearing a void hardened version of the greatcoat uniform so that he can keep up with the Solar Auxilia!

So when building the model, the key requirements were:

  • Be game legal, i.e. same equipment as a companion
  • He should be wearing black carapace armour
  • He should be suitably bling-y to represent his high status.

The first thing to go on the model was the chest winged-skull. I feel it’s too identifiable with 40k rather than 30k. It was a fairly straightforward process to scrape off with a sharp knife.

Likewise the arms and boltgun too clearly read Space Marine rather than regular human. It also was the wrong equipment for a bodyguard in a Solar Auxilia command squad. So I replaced with bits from the Death Korps of Krieg kit and a laspistol from the Solar Auxilia Command section. Given the width of the chest it was too difficult to make a pose where he was holding the rifle with both hands.

For the head I knew the scout head was a no go. I’ve wanted to use the Skitarii heads for some time and I thought it would work aesthetically here. However I wanted to bling up the helmet a bit – after all he is a bodyguard for the rich and famous. So I added the crest from the Solar Auxilia Command section which I think works nicely alongside. It didn’t take too much shaving to make work and I feel it helps make the model look nice and fancy.

As a late addition I thought it fun to add the medals from the Krieg veterans set. This would help add some bling factor and would also hint at his experience.

Painting

When it came to painting, the black carapace was a given. I tried adding some edge highlighting with greys but in the end it looked too much like I had overpainted from the grey fatigues so I left it.

With the rest of the model I wanted to make sure it fit within the palette of my army, so gloves, metal, leather and other bits were all painted in the same way as my Solar Auxilia.

Conclusion

I am really happy with him. I feel he stands out and looks suitably menacing without detracting from my Lord Marshall.

Magic the Gathering Secret Santa

With a rare meet up for the three of us earlier this month, we decided to do a MTG deck secret Santa this year, with each of us building a deck for someone else in the trio. The only stipulations were:

  • The value of the commander cannot exceed £5.
  • The value of the deck outside the commander cannot exceed £50.

We thought it would be fun to explain and give some tips on budget deck building, so check out our deck ideas below!


Stu’s Deck for Jamie

I was very excited for this challenge. I have lots of cool cards that I’ve been wanting to play around with but which don’t make the 99 in more competitive decks. However they would be perfect for this! I have a lot of cards from the Adventures of the Forgotten Realms set as that really helped consolidate my love for MTG and I cracked a lot of boosters at that time. I had always liked the idea of the ‘Party’ Cards but they seemed to struggle to fit other decks and I saw this as an opportunity to lean in to them. Not only are they cheap cards (which I already own most of!) but they have a unique play style and also reference Dungeons & Dragons which we all love playing.

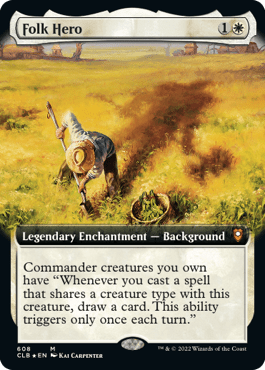
My first thought was a mono black deck as basic lands don’t break the budget but then I thought it would be more fun with two colours to let me include more of the Party mechanic cards. I also remember Jamie loving the idea of ‘Background’ cards and thought this was the perfect chance to use one to introduce a second colour. I also love commanders that have some sort of draw a card mechanic which ‘Folk Hero’ does. ‘Burakos’ is really cool as he generates extra mana in the form of treasures (and these treasures also play into an aristocrats sub theme). He also most importantly counts as all of the ‘Party’ classes which helps a lot with the deck’s game plan.

This deck is a midrange deck which has a relatively low curve and likes to play out lots of cheap creatures – the vast majority of these are either ‘Clerics, Rogues, Warriors or Wizards’ which are needed to create the party and generate extra value. I was worried that this would be a bit inconsistent if Jamie drew several rogues but no warriors for example, so I added the ‘Changeling’ cards in to help smooth this out and build consistency – this was cool as I hadn’t used many of these cards previously. The deck also has some fun cards to buff up the board to hit for more damage with Mikaeus the Lunch, Jazal Goldmane and Mirror Entity all being able to buff the board whilst also being ‘Party’ members themselves.

The deck has an aristocrats sub theme to help punish opponents for killing off creatures and to help close the game out. Mirkwood Bats & Marionnette Master are in there to help add extra damage in for sacrificing treasures. Also there’s a few good aristocrats pieces that are within the ‘Party’ classes, eg Nadier’s Nightblade and Zulaport Cutthroat, so the sub-theme fits nicely alongside the deck’s primary game plan.

My deck also has an alternate commander, Nalia de’Arnise, who plays off the ‘Party’ mechanic in a different way for some added variety. She also is just a great card in the 99 and helps generate more value as well as pumping up the board.

Jamie’s first reaction: What a fun deck! The party mechanic is a cool one allowing some serious synergy within the cards which is very cool! Black is a colour that I really don’t play enough with and requires a bit of thinking around recursion and life management, but it’s been fun playing around with it more. Burakos’ ability to create a decent amount of extra mana every time it attacks really helps, though I did get a bit mana screwed in our first couple of games. Once it got going though it really became a monster in combat! Interestingly also Stu put a few shapeshifters in the deck which are great for giving me maximum flexibility when it comes to ensuring I have a full party.


Jamie’s deck for Tom

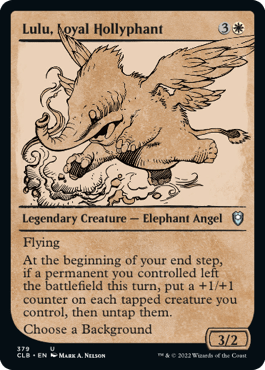
So the deck I built for Tom is Lulu, Loyal Holiphant paired with the background Cultist of the Absolute.

It’s an Orzhov aristocrats/go wide counters deck that is all about sacking or buffing tokens to grind out opponents. My reasons for doing so is I wanted something we’ve not seen before with the background mechanic (as a side note it’s funny that Stu built an Orzhov deck with a background- clearly we were on the same wavelength!). Additionally Tom doesn’t typically run black in his decks so I wanted to give him something different to try out.

My thought process with the deck was to turn the sacrifice cost in Cultist of the Absolute into a benefit for his deck, by ensuring the +1/+1 counters from Lulu always come online. I also added some cards that tap outside of combat and cards with etb effects so Tom feels less bad for sacrificing them as the card has already fulfilled its purpose!

When building the deck, my first step was going through cards in my binder. Doing so I found quite a few cards to fit the theme, and then it was a case of focusing the playstyle so it wasn’t too scattergun. I also thought it was important not to include too many colours as typically colour fixing lands are spenny. So to keep it simple whilst ensuring I had budget to spend on cool cards meant limiting it to one or two colours really. Finally, I thought it was better for a couple of ‘okay’ cards rather than one mega spenny card in the 98. Given the typical length of games, chances are Tom is not always going to draw that mega card and so the rest of the deck risks feeling lacking as a result. My final tip is to look for cards one level ‘lower’ than you may originally want. This is because lots of cards are good but are a lot cheaper because there’s a better, more spenny one out there that people typically pick for more competitive decks.

Toms first reaction: I’ve always wanted to build a background deck, so when I saw the commander/background combo, I was hyped to try it out! On top of that, I used to play a ton of Neverwinter on Xbox, and Lulu plays a big role in one of the quests, so having her as my commander felt like a fun nod to that. Trying to keep track of all the triggers was hilarious, and you could tell Jamie put a lot of thought into making the deck really synergize, which was awesome. We did notice it could use a bit more card draw, but overall, Jamie built me a seriously badass deck!


Tom’s deck for Stu


For my Secret Santa, I got Stu, which was a bit tricky. He’s got tons of decks and is always building new ones, so coming up with something unique was tough. But since he loves black and enjoys complex strategies, I decided to make a commander deck that fits his style. While going through my commander binder, I found Judith, Carnage Connoisseur and thought she’d be perfect.

The deck’s plan is to get Judith out and then cast lots of instants and sorceries. With Judith’s ability, each instant or sorcery can either gain deathtouch and lifelink or create a 2/2 red Imp creature token that deals 2 damage to each opponent when it dies. This helps control the board by reducing opponents’ creatures while also gaining life and making Imp tokens. I added several ways to take advantage of the Imps’ death triggers to make the deck more effective.

During playtesting, I realized I needed to adjust the number of instants and sorceries. Since Judith gives deathtouch to these spells, there were too many board wipes, which wasn’t ideal. After tweaking it, the deck ran more smoothly.

Seeing Stu’s reaction when he drew some of the deck’s cooler cards was awesome. I’m really looking forward to playing against this deck more in the future.

Stu’s first reaction: This deck slaps! And it’s a really cool deck to play with. It includes black which is my favourite colour but the commander leans in to a spellslinger style deck which I’ve not played around much with. The alternate commander, Torwaki is a lot of fun to play with and I’ve thought about building a deck for him for a long time. I really enjoyed giving spells death touch and wiping the whole board with a 1 damage ping spell (and also gaining a surprising amount of life). There’s some really fun instants in this deck as well as other payoff cards that damage opponents or generate more value from casting spells. I really enjoyed playing it and can’t wait for some more games. Gimli, Counter of kills ended up being a MVP in a couple games as he really punishes opponents for sacrificing things which Jamie & Tom’s decks are built around!


All images are taken from the Magic the Gathering card database – can be accessed at https://gatherer.wizards.com/Pages/Default.aspx

Midnight Moon Madness – Adventures in Marvel Crisis Protocol,

We met up recently and managed to squeeze in some MCP games. Neither of us have played in a while and were trying out new rosters. We tried to brief each other, including confirming that neither of us had any throws with our characters. Turns out we were both very wrong and, as you will read, used them to good effect in the game! The turn 0 conversation is only useful if you know what your own team actually does!

Don’t worry, I don’t have any throws in my list

Famous last words of Stu and Jamie, completely forgetting that in fact both of them have throws…

Team:

Both of the Crisis Cards we drew randomly were 15 threat missions so the threat level was already decided for us.

Stu brought Midnight Sons with Blade, Wolverine, Wong and Doctor Strange.

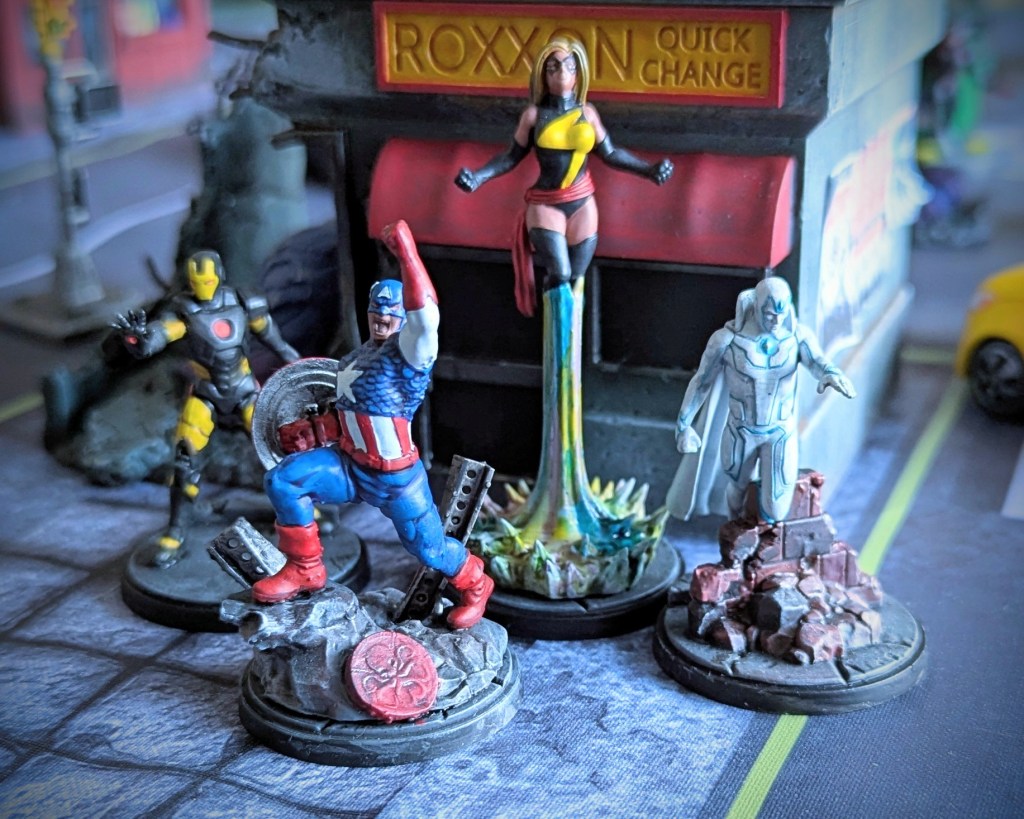
Jamie used Avengers with Steve Rogers Captain America, Iron Man, Vision and Captain Marvel.

Crisis Cards

Research Station Attacked & S.W.O.R.D Establishes Base on Moon’s Blue Area

Game Summary

The first round was largely focused on moving up to secure the objectives, with each claiming two S.W.O.R.D. bases. A last minute move from Iron Man ensured that the Avengers secured the Researcher but otherwise there were not many attacks other than Captain Marvel sending a warning blast of energy towards Doctor Strange.

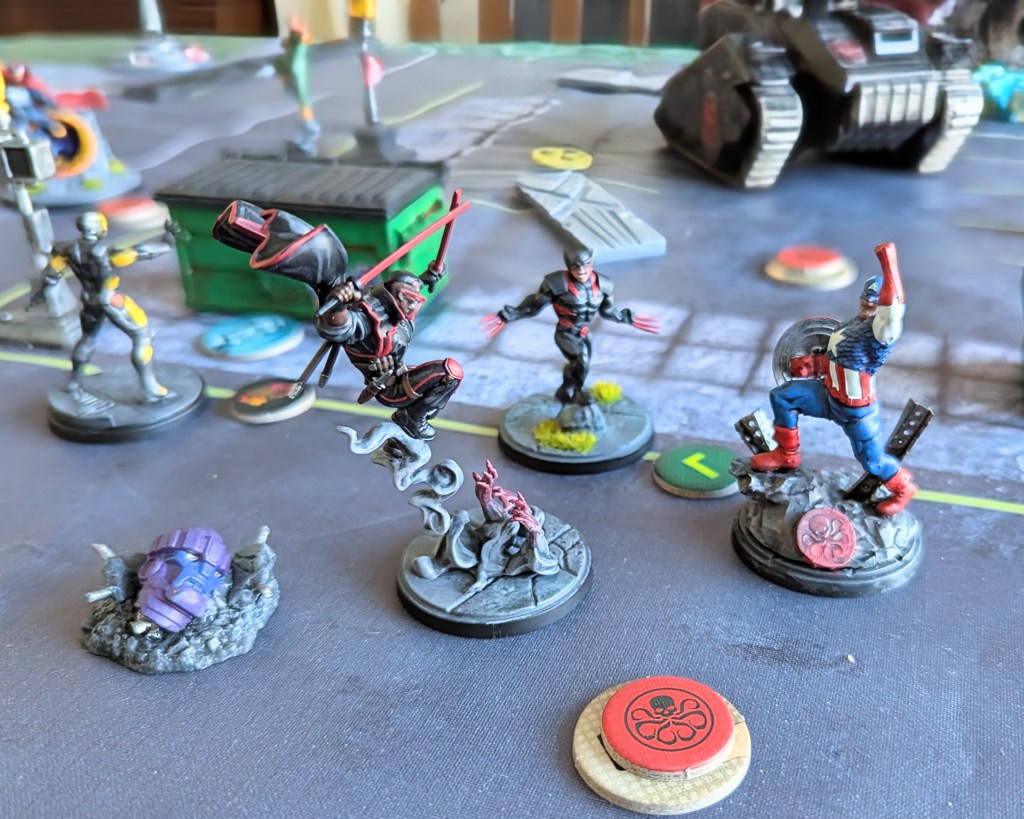
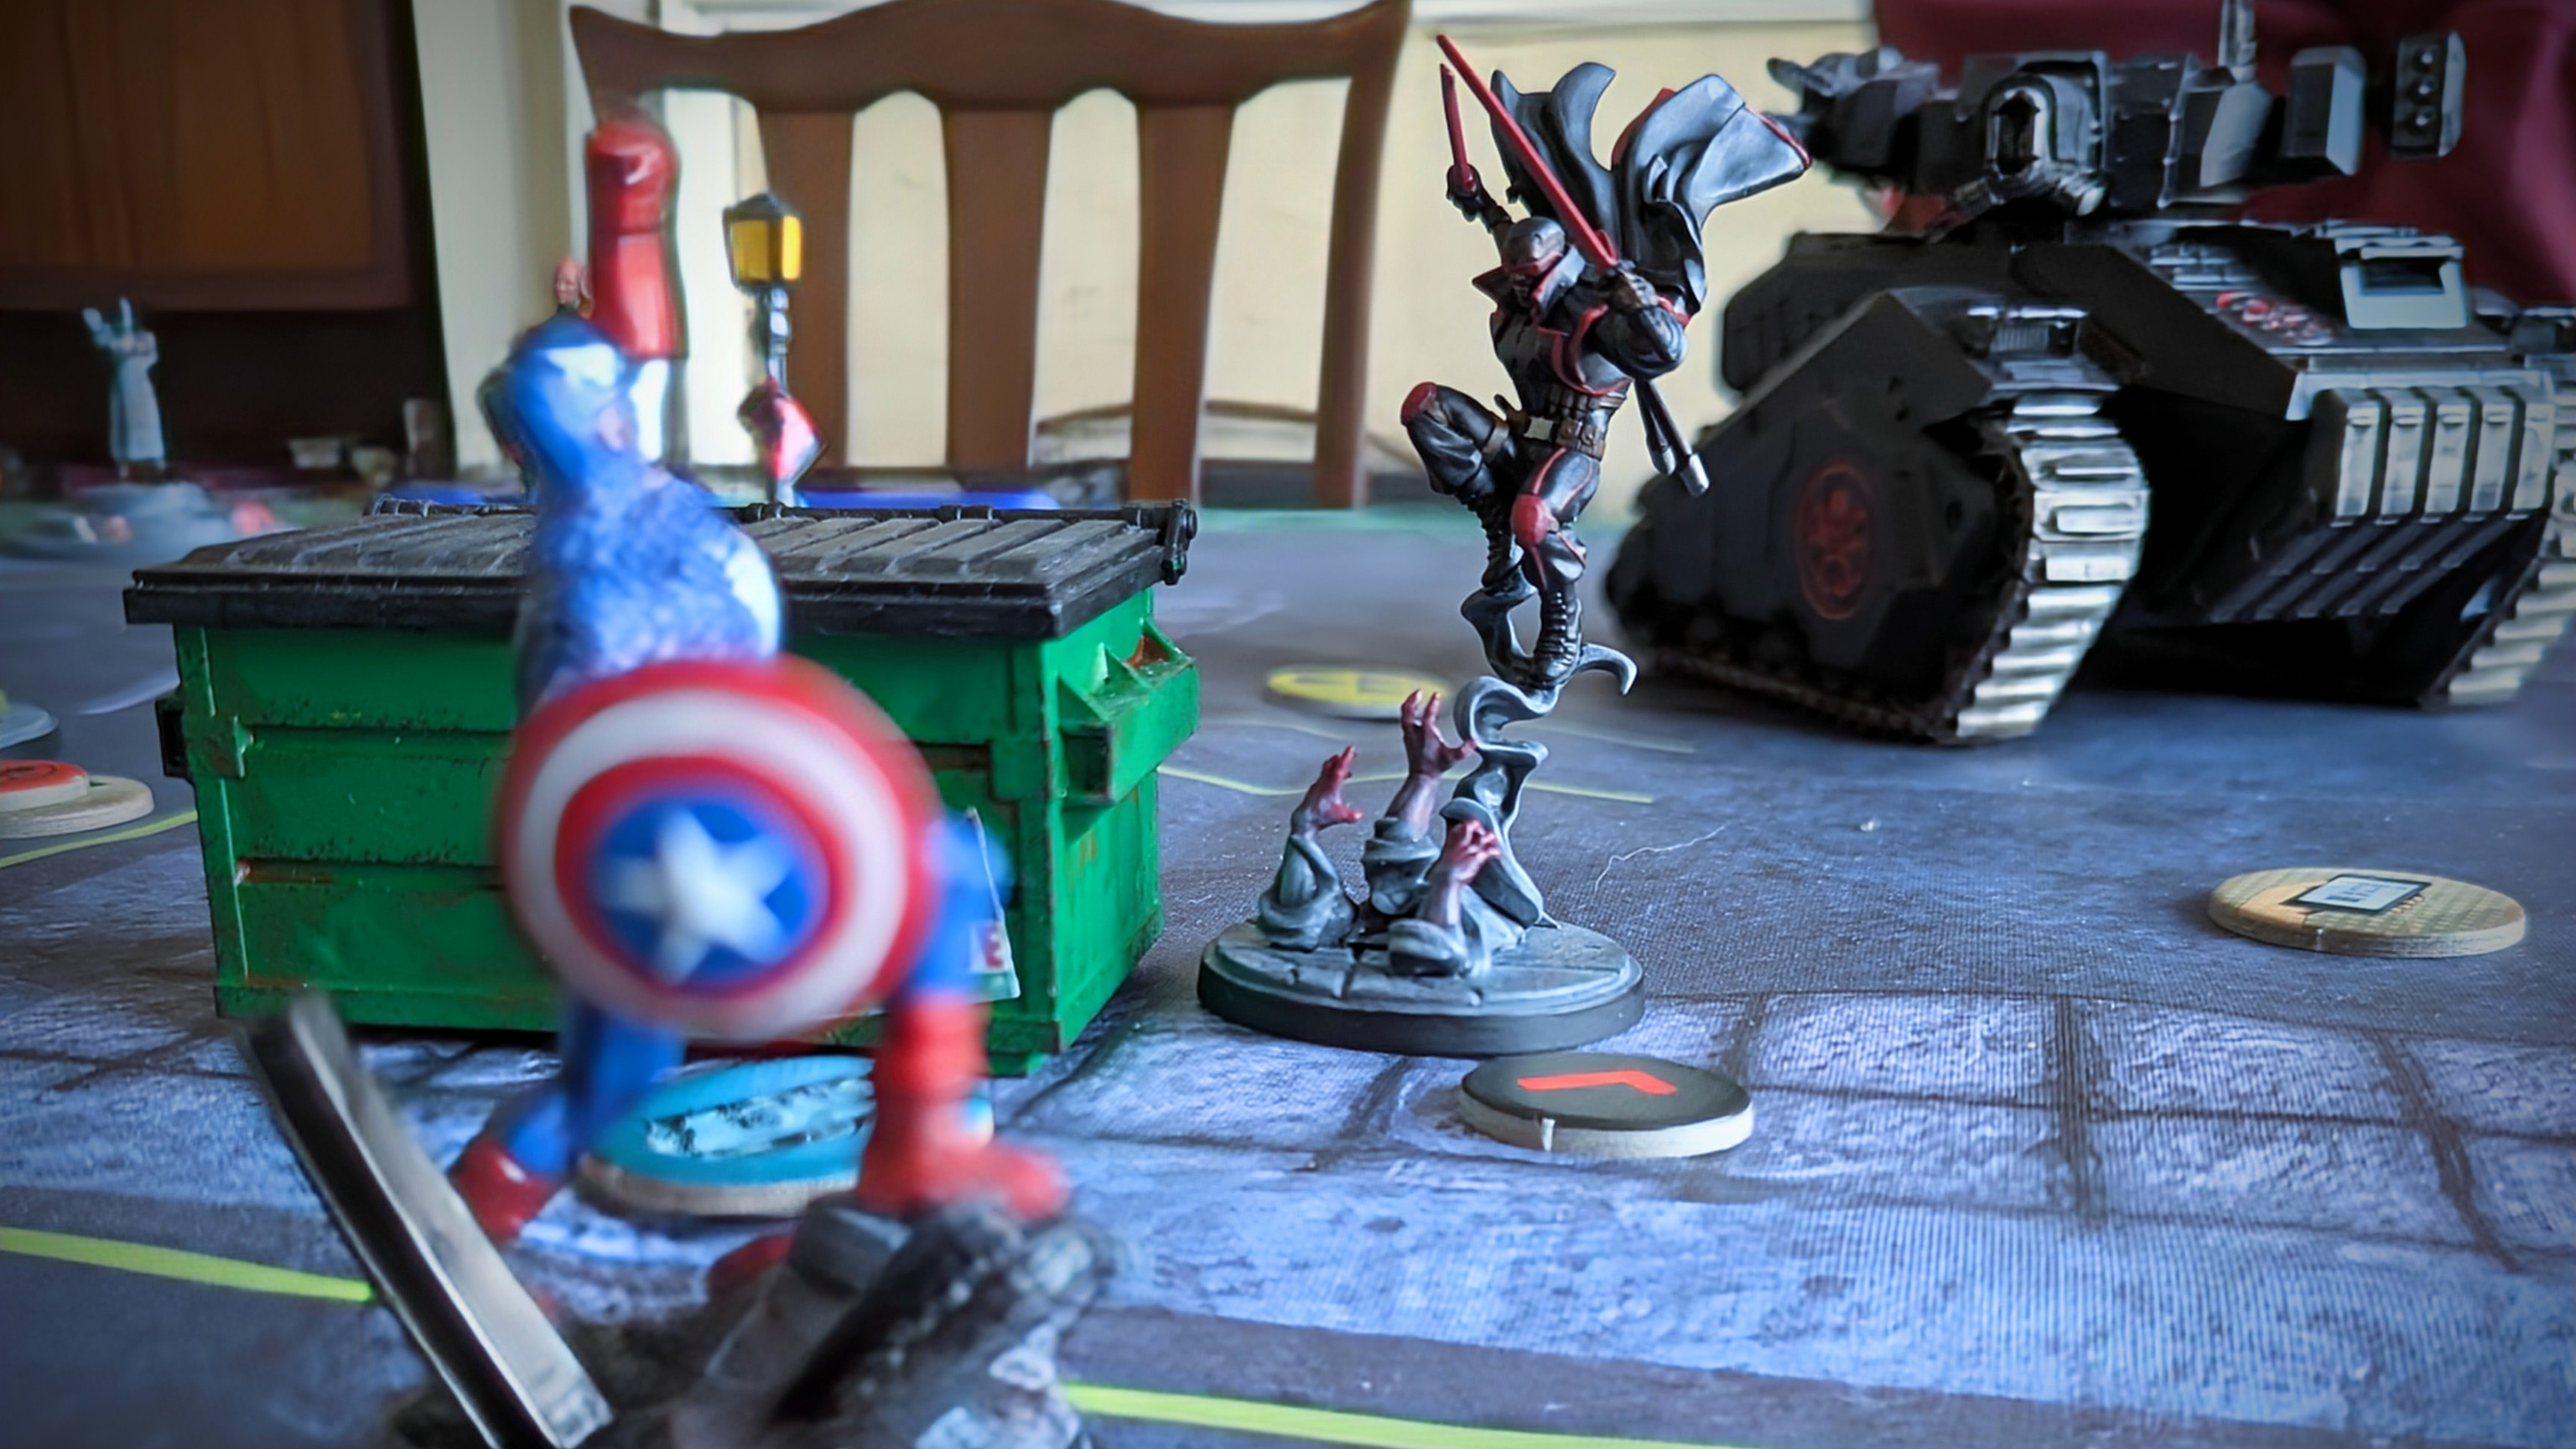
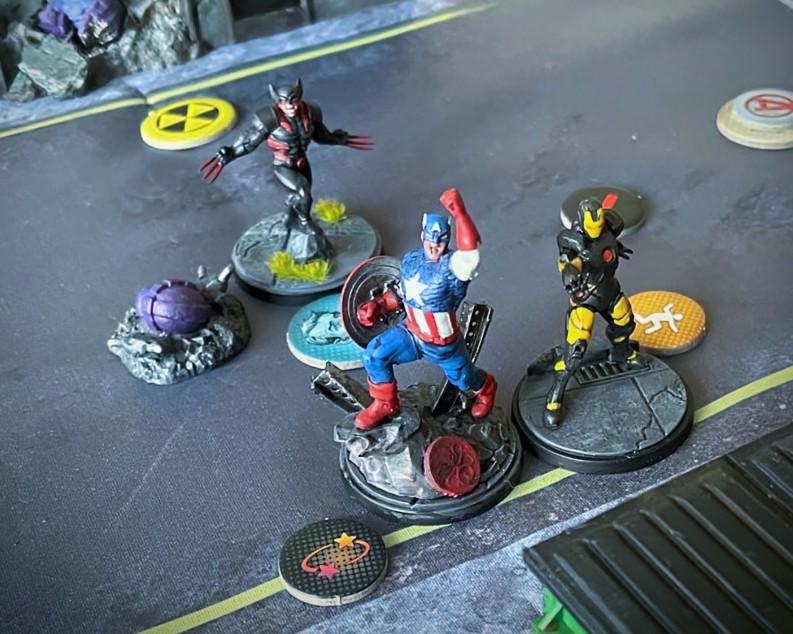
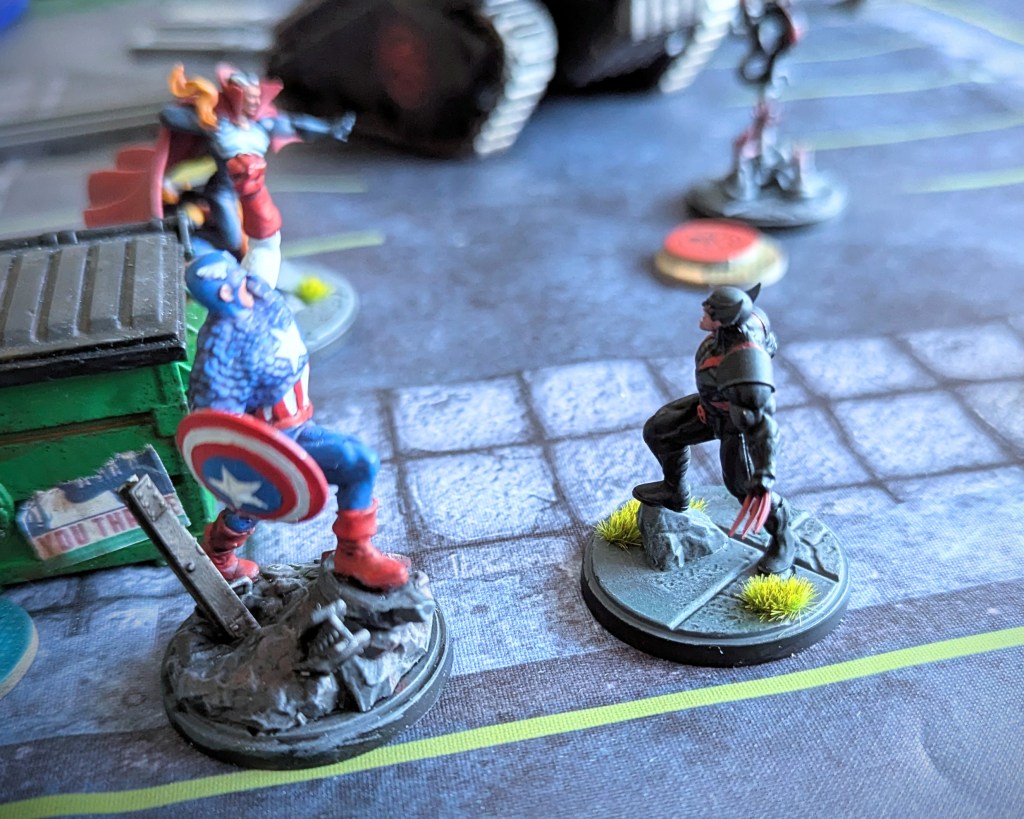
The team leaders facing off in the middle of the board.

Things heated up in round two as Doctor Strange staggered Iron Man and damaged Captain Marvel. Vision’s beams and throwing of Wolverine did not do much due to some exceptionally poor rolls by Jamie! Wolverine showed how it was done by angrily leaping over Steve Rogers and aiming for Iron Man. However Captain America threw himself in the way, keeping Iron Man alive but getting dazed in the process. Finally in his smashing turn Wolverine made Iron Man bleed before bumping into range of the objective. 

Iron Man shook his stagger before unleashing homing rockets at Doctor Strange with the help of Friday AI. However he failed to do serious damage to Doctor Strange, who used mystic shields to block the damage. Blade hit Vision with his mystic katana, flipped the console to the Midnight Sons before bumping into the middle to trigger his vampiric immortality and heal off the bleeding Avengers.  Captain Marvel beat up Wolverine before slamming a building on top of him to daze him. Wong meditated and healed Doctor Strange. Whilst Iron Man held the Researcher, the Midnight Sons took control of the S.W.O.R.D. base. 

The Avengers had priority in turn 3 and Captain America started proceedings by throwing his shield at Wolverine but completely whiffed his attacks! Wolverine dazed Captain Marvel with his berserker barrage powered up by his wild rage. Then Stu activated the Siege of Darkness to let Doctor Strange and Blade Attack too, dazing Iron Man as well. Vision beamed and tried to throw Wolverine into Blade again but Stu used Brace for Impact to negate this.

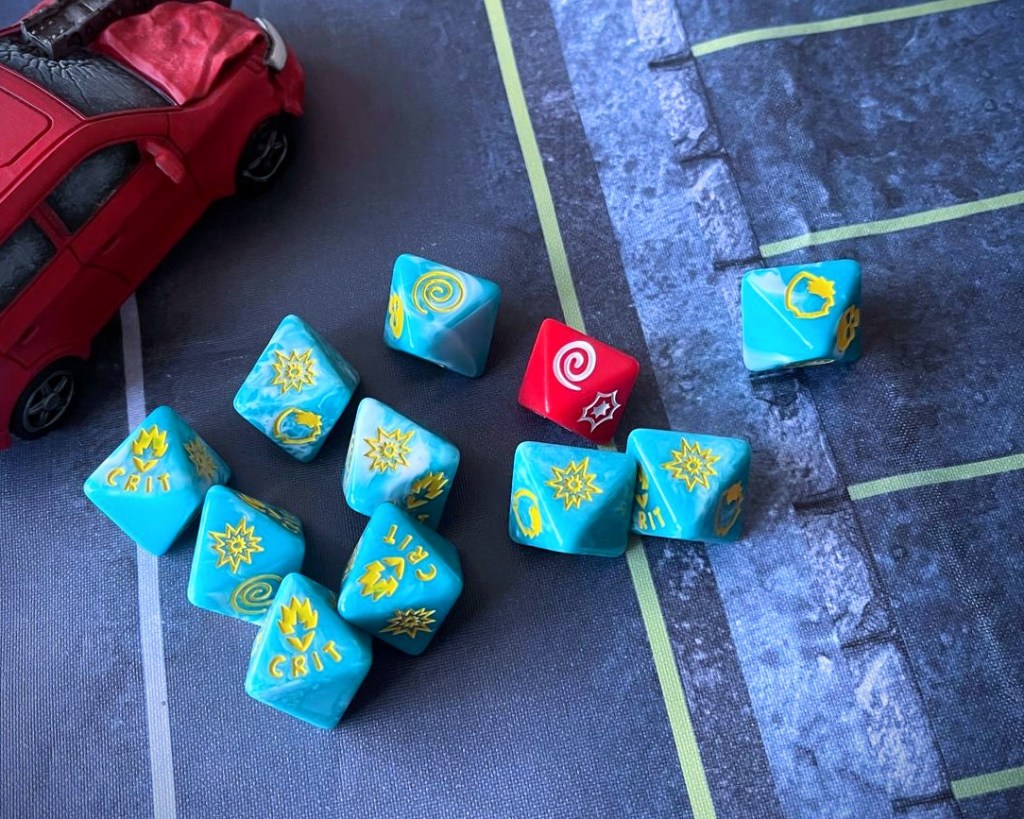
Things were looking somewhat bleak for the Avengers at the start of Turn 4. Whilst Vision used Patch Up on Captain America and then triggered Avengers Assemble to reposition the team, Wolverine responded by killing Captain America with 10 damage in one attack!!! Iron man beamed Doctor Strange and Blade wounding them before pushing blade away from the action. Doctor Strange responded by killing Iron Man and retaking the S.W.O.R.D. base. For the last action of the round Captain Marvel swooped in and dazed Doctor Strange before throwing a car into Wong.

The dice roll that condemned Captain America

At that point it was clear where the game was going, with the Midnight Sons ahead both on the board and in terms of points. We therefore decided to call it there with a victory for the night boys!

Lessons Learnt

Stu used the place on Wolverine’s berserker barrage to great effect during the game, really helping bounce Wolverine round the board.

Jamie

MVP: Captain Marvel
I was very impressed with how the OG Captain Marvel plays. She was pretty mobile and vary capable of holding a flank by herself. Additionally her powers really benefitted from Captain America’s leadership ability reducing their cost and she was able to get some throws off to good effect.

Speaking of Captain America’s leadership – it is just a really good, if simple, leadership. Making superpowers cheaper makes all the difference (for example making bodyguard and Vision’s throw both cost only 1 power) and means you can be a lot more efficient in your plays. The Avengers Assemble card is really good, with the extra movement really handy for getting everyone in a better position – I used it to get Vision (with a stagger) and Iron Man in position to use some beams without having to spend an action moving. Overall I thought Iron Man was a bit underwhelming, but I also did not think that I played him super efficiently.
I was semi impressed with Vision (though the dice rolls let him down with his beam attacks). However I thought he was good at building power but did not have much of an outlet for spending it.

Vision being immune to Bleed really hampered Blade’s plans

Stu

MVP: Wolverine 
Especially on his damaged side. Who needs to contest objectives when you can throw 4 extra dice and shred enemies!

I really enjoyed playing with the Midnight Sons and was a nice change from my usual Asguardians of the Galaxy hybrid list. Still far from using them optimally but did learn a lot from the game.
Wolverine was my splash character and included based off the recent Midnight Sons comic run where he teamed up with Blade. He absolutely shredded enemies (with some lucky dice rolls helping out) and took a fair beating with his healing factor keeping him in the game. Wong didn’t attack once! But didn’t need to and his utility abilities of generating and passing power to others and healing up Doctor Strange were really useful. Loved using him and felt like 2 threat well spent. All my characters had only medium moves but ‘Bump in the Night’ ability gave them extra mobility and unpredictability and Wolverine had some surprising extra mobility with his Berserker Barrage ability.
I was really suprised by how tanky Steve Rogers was on his wounded side by adding blanks to successes, which also negated my pierce abilities on Wolverine and Blade. This coupled with his ability to bodyguard others and take their hits made him very powerful defensively and made it hard for my team to really ramp the pressure up and finish off characters.

Not even a vibranium alloy shield can protect you from a berserker barrage

Digging in – Siege of Vraks preparations

As we’ve posted before on our blog, we love the Siege of Vraks. We always planned on doing a bunch of Vraks themed projects this year, but it also coincidences nicely (and totally coincidentally) with a campaign being run of the Vets of Vraks Facebook group. We thought we would set out a few bits and pieces below to hopefully provide some inspiration for fellow Vraks enthusiasts!

Kill Team

Although from the previous edition of Kill Team, here are our first Vraks themed teams. Jamie used existing minis from his collection whilst Tom bought a new box to bulk out numbers for his Krieg.

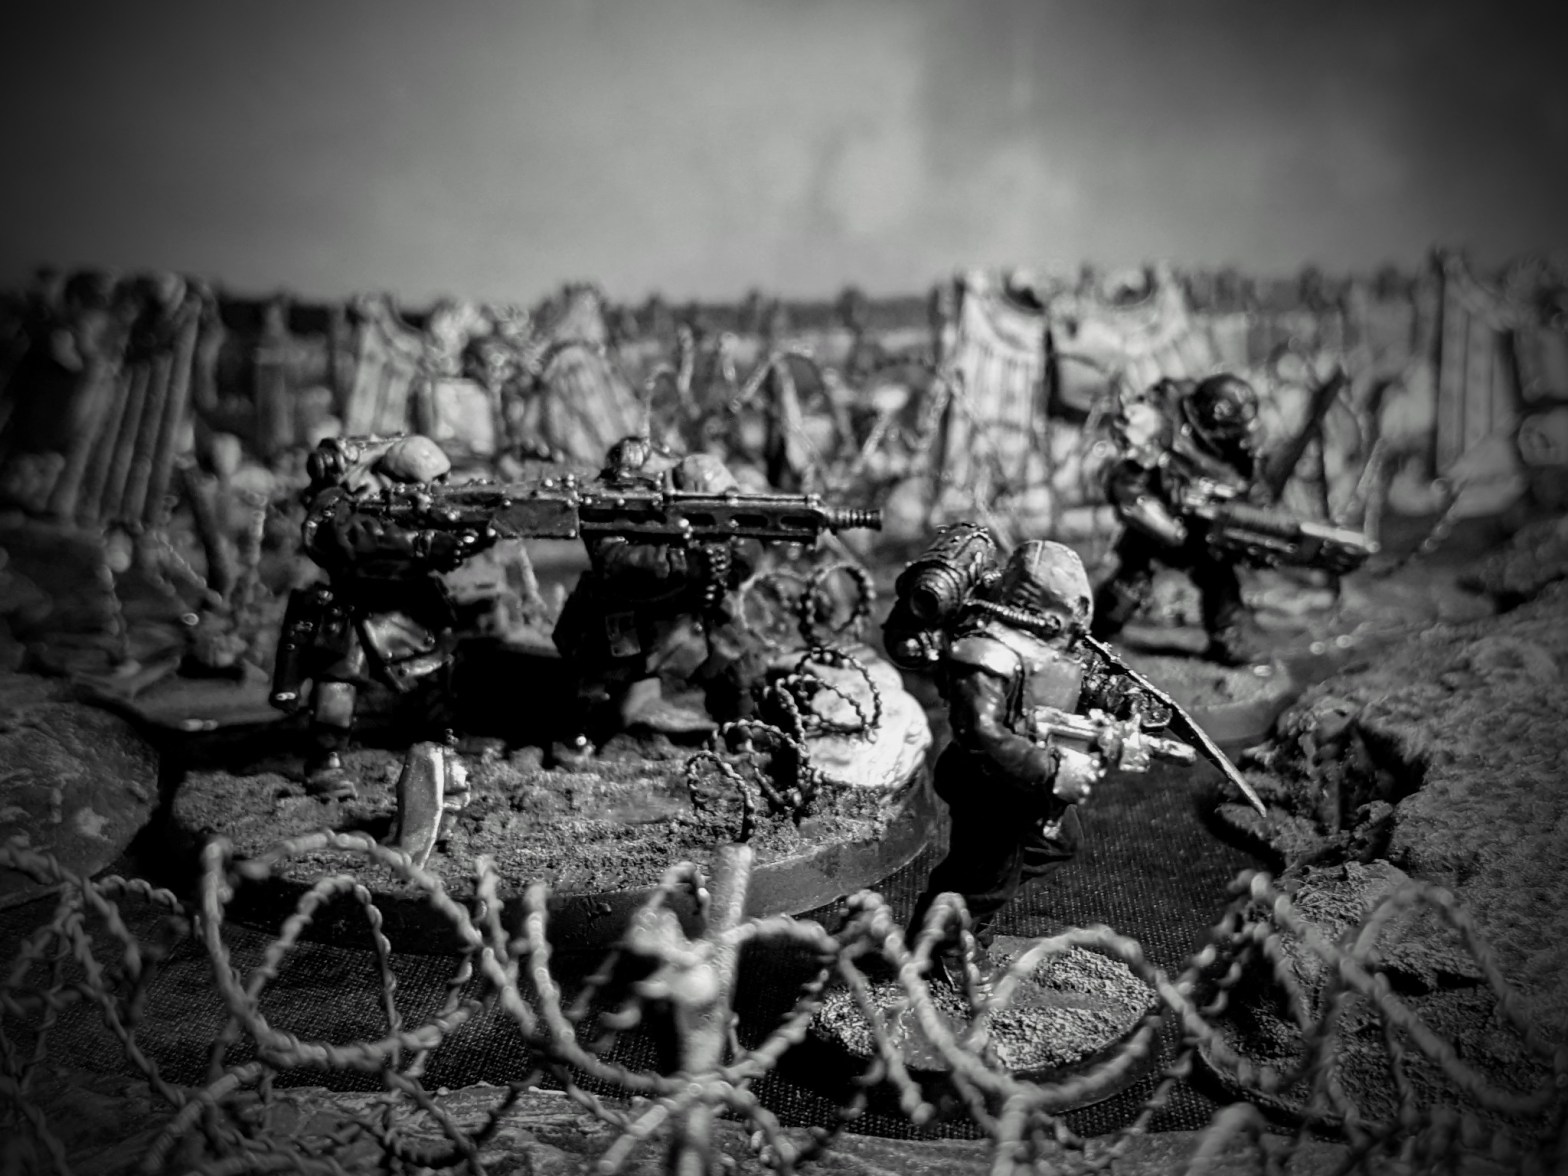
Kill team is perfect for playing the trench raids, no man’s land incursions and other operations that were a daily occurrence on Vraks. The couple of games we played have shown how bloody a game it is, and it is fun how fast paced it can be (once you get a handle on the rules)!

A map of the board for Kill Team. We had to slightly adapt the rules for terrain to make the trenches effectively at a different level to the rest of the board otherwise everything was a little too open.

Each of us have been building Kill Teams, from the Bloodied and Veteran kill teams to Stu’s Apostles of Contagion and Jamie’s Red Hunters – we are determined to include some of the more niche factions as well.

One thing we want to explore is linking Kill Team missions with a separate full scale game. This way the result of the Kill Team can impact the advantages either side gets in the main game (for example cutting more gaps through barbed wire or taking out sentries to advance closer undetected).

Full Scale War

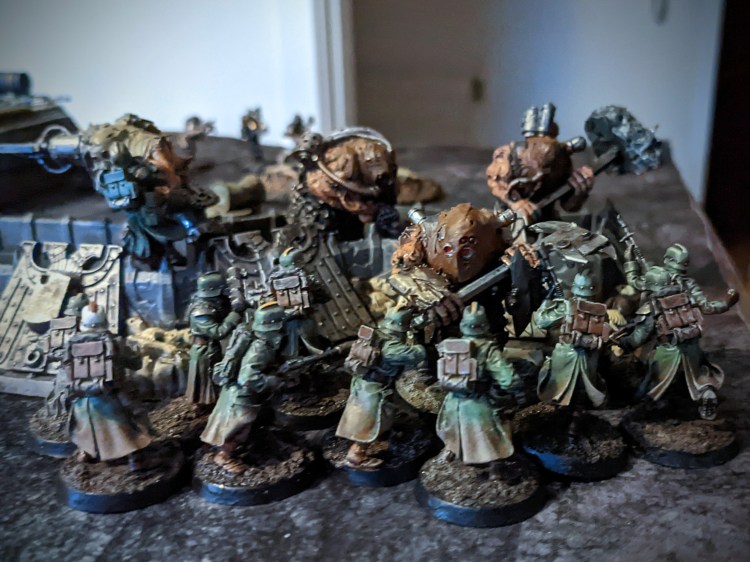
For the various pushes and counter-assaults there’s nothing better than full games of 40k. However, rather than play with the current edition, as the Death Korps of Krieg Siege Regiment and the Renegades and Heretics lists from Imperial Armour 15 have more flavour we have decided to use these. They keep the platoons and orders system from 7th edition that just feel right when it comes to the siege.

No surprise this ended badly for the Krieg squad…

So our plan is to use the rules from Horus Heresy (as they are an update to 7th ed) and all the relevant codices from 7th edition of 40k (so Space Marines, Grey Knights, Inquisition, Chaos Space Marines and Chaos Daemons). We may need to tone some things down (looking at you formations…) and we also want to include some things from the earlier Siege of Vraks books that did not make it to the 7th ed codex, such as Apostate Preachers and Commissar Tanks.

Artillery are going to play a big role in games – as they should!

We have already played one game using this format which you can read about here. Hopefully we will have a few more games played soon and then we can post some more reports!

Terrain

During lockdown we spent some time painting up a bunch of terrain including razorwire, tank traps and minefields. Coupled with aegis defence lines and walls of martyrs we can build nice looking boards.

The first minefield we built. The goal is for the defender to place down markers that, when the attacker gets close to, can either be a minefield, booby trap or just nothing.

However, we’re also super extra and so have decided to start working on a full 6×4 trench board. This will be broken into four separate 3×2 boards to both give us flexibilty of set up and so we can play Kill Team. We don’t want to give too many spoilers away but hope to be able to share some works in progress shots soon!

Tom, Stu and Jamie

Dok’s Shop – Traitor Solar Auxilia

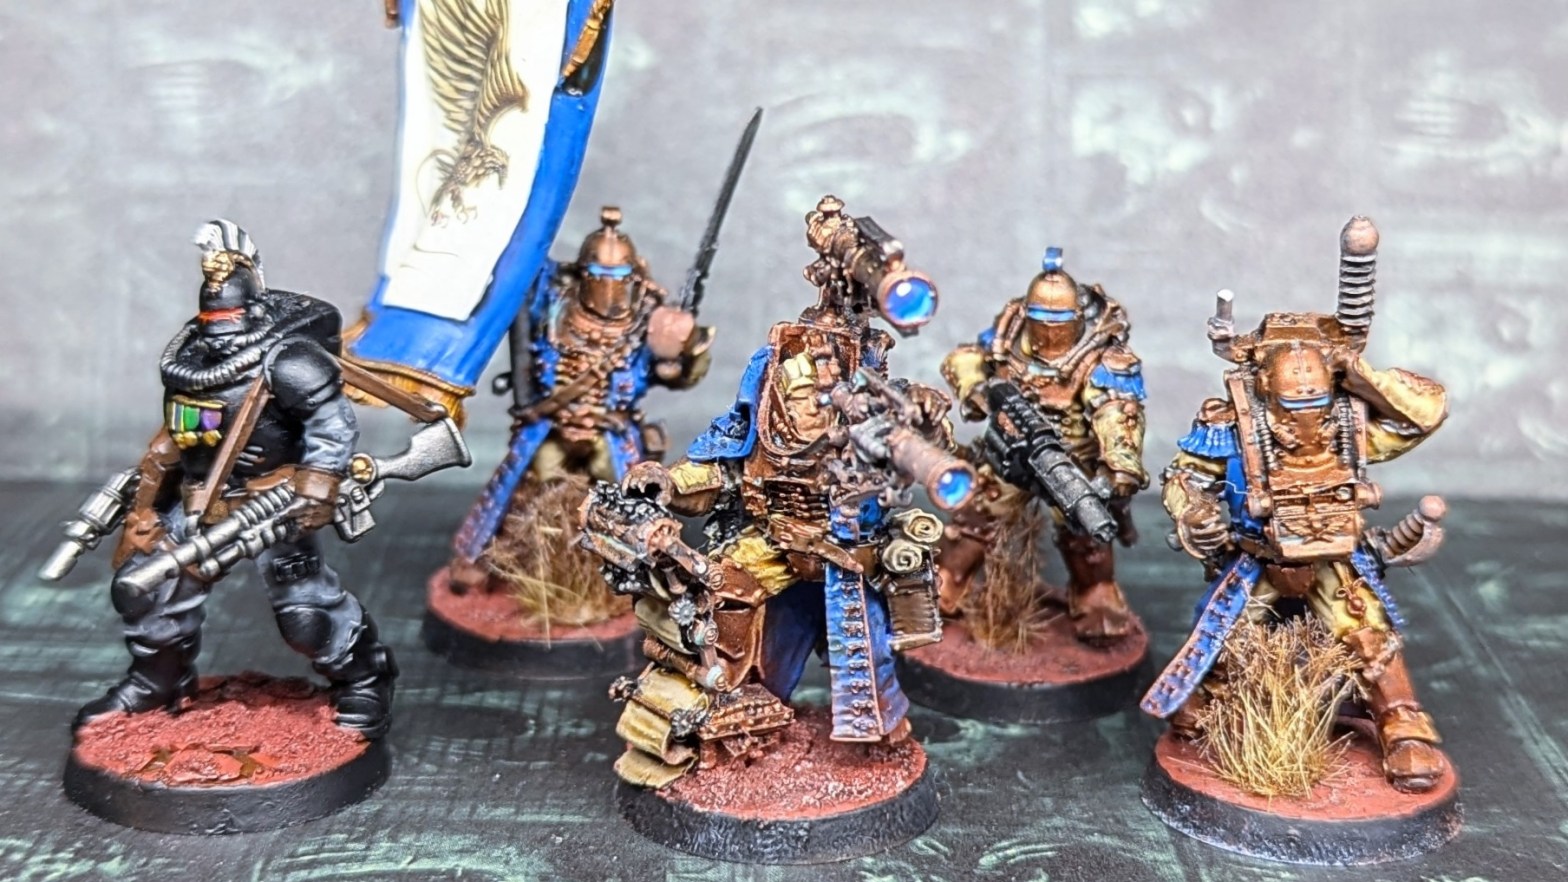
Hi everyone! As part of WIPWednesday, I thought I would do an article on my traitor Solar Auxilia commander squad.

Concept

I love my Solar Auxilia and have put some effort into creating fluff for the force as loyalists (which you can find here and here). The problem is most of my friends also play loyalists. As such, I do not enjoy playing with my Solar against them as it is not easy coming up with a narrative reason for them to fight other than it being a ‘training exercise’ or one of the armies is actually Alpha Legion in disguise. So I decided to do something about this as I’m desperate to play more games with my Solar.

Where I ended up was converting an alternative HQ for my army that was clearly traitor. I would paint them to match the rest of the army, just chaos-ify them. This way, I can bring essentially the same army with me, but by changing out the HQs I can play traitor or loyalist without compromising the fluff!

Plan

I was inspired to some extent by Imperial Armour Vol.5 which says that, at the start of the war on Vraks, most of the low level soldiers in the Renegades and Heretics did not necessarily know who they were fighting for, they were doing what they were told by painting on various symbols.

Given the traitor factions are mostly in their early stages of the chaos influence, I thought a similar thing could work here – the leaders of the army had been indoctrinated into the Primordial Truth and so were more corrupted, but the line troops had yet to be subject to the same level of influence and so would look outwardly the same as loyalist auxiliaries.

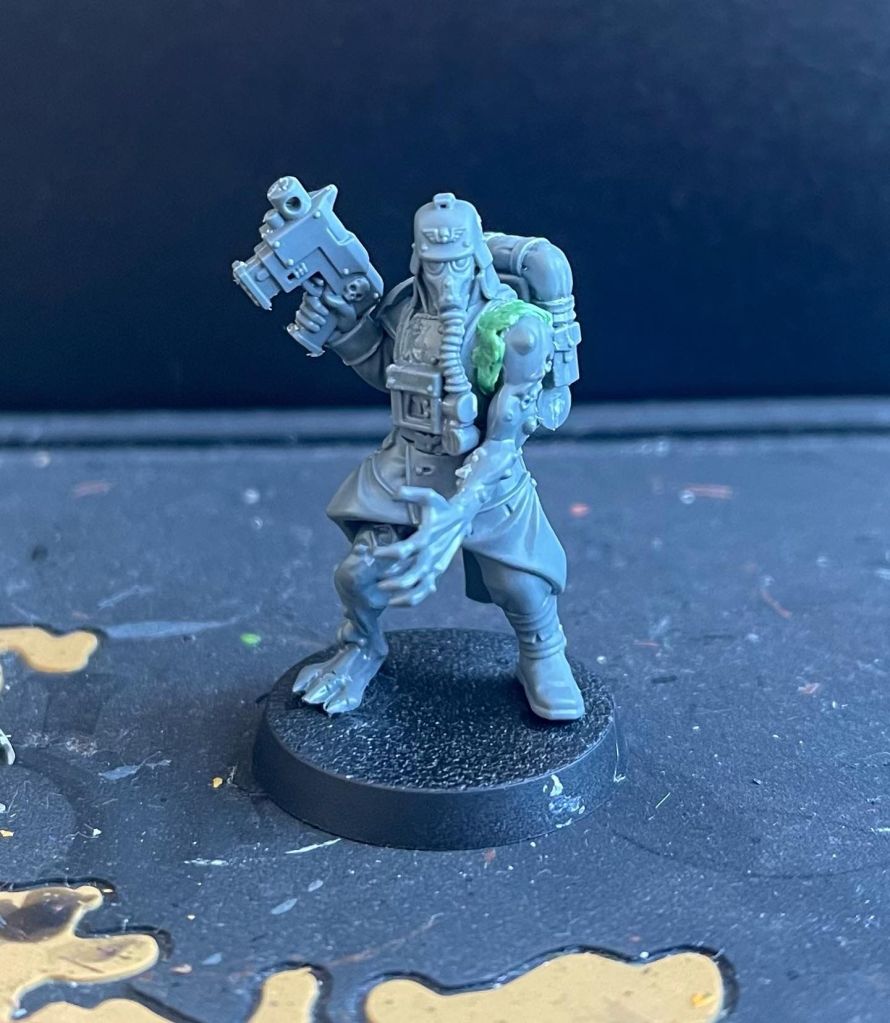
I wanted to make them look clearly traitor and followers of chaos but I didn’t want them to look overly mutated or possessed. They might be fanatics, but I still wanted them to look like soldiers. My fear otherwise is that they would stand out too much against the rest of the army – save the tentacles, claws and other bits for the Tainted Flesh Militia army!

So, armed with the new Solar Auxilia Tactical Command Section, the Dark Commune set and my bitz box, I got to work.

Lord Marshall

My Lord Marshall was a relatively straightforward conversion and I mostly built him out of the box other than his head and hands.

I wanted to give him more of a ‘command’ pose than an overtly combaty one. The pointing hand comes from the vehicle kit. Combined with the bare head I think it gives him a nice overseer feel, like he is directing the troopers to their deaths, all to further the Primordial Truth’s plan.

One of the main inspirations was the staff from the Dark Commune set. It looks so cool and I thought it would work well as some kind of fancy power weapon for him, with the squid/bird thing ‘charging’ the weapon. Now I need to come up with an explanation for why he has such a weapon – perhaps a gift from the schemy Word Bearers?

I also thought it would be cool to have him un-helmeted. Whilst this technically means the suit isn’t void sealed, I figured it would allow me to try out some tattoos or markings on the model.

Auxilia Captain

This was the last model I built. I may have been an idiot and missed it, but I could only find 5 of the filter systems. Luckily I was building a basilisk at the same time, so pilfered a filter from the internal crew there so I could do the sixth man.

I forgot to take a picture of this guy before I started painting…

I wanted the Captain to look more like an enforcer – the Marshall gives the orders and this Captain makes sure people obey! Being the only helmeted model in the unit helps make him look a little more menacing – who knows what face is behind it?

I toyed around with a number of different arms and weapons here as I was desperate to use the axe from the Bloodied set. However, I couldn’t get it to work and sit naturally, so in the end I went for the mini cleaver you see on this model. The look is still pretty menacing from my perspective and suits the more ragtag weapon look.

Cohort Standard

This was a straightforward conversion, I built the banner bearer pretty much straight out the box but replaced the Solar Auxilia banner with the one from the Dark Commune set and added an auto pistol. I figured their equipment would be a bit mismatched. The banner is huge and I think will help signpost the allegiance on the battlefield!

I also added a bare head from my bitz box. I think it is from the Blooded Kill Team set, but it might also be from one of the Cadian sets – the downside of snipping out everything is it’s hard to work out where it all came from!

Command Vox

As with most of this unit, I built the command vox character as is, but then added the weird floating head thing from the Dark Commune set. I thought it might be some warp shenanigans to boost the signal and allow for better communication amongst the traitors – like the flasks used by the Word Bearers and their allies on Calth.

I need to add some more cabling to tie the floating head into the model more, but overall I think it’s a fun combination of technology and mystic that suits the traitors nicely.

Companions with Plasma Guns

These were the most penikity to convert. I used plasma guns from the marine kit, carefully carving away the trigger and grip sections. Then I took lasrifles from the command set and cut away as much of the rifle as possible before slotting into the plasma guns. They still need some green stuff to cover up some of the work but I’m happy with how they look at the end.

I finished these both off with some heads from the Blooded kit, again I think they look quite menacing.

Conclusion

Overall I am really happy with this squad and feel like they have fulfilled my original goal. They definitely look like traitors but they also don’t look like they have lost themselves to the warp quite yet either.

Now it’s time to paint them up and see how they fit alongside the rest of my Solar Auxilia.

Jamie

This is Aragorn son of Arathorn, you owe him your allegiance.

With the Lord of the Rings universe beyond released, I knew exactly which commander deck I wanted to pick up and it needed to be the Riders of Rohan Precon.

Not only does this deck contain so many iconic LOTR characters, it taps into my love of Rohan as a faction and it also allows me to use Aragorn King of Gondor as a commander and go mad with some Monarch shenanigans. I’ll be honest, when I picked up this deck I didn’t ever consider using Eowyn Shield Maiden as the commander, in fact I took the card straight out and replaced it with something else. Don’t get me wrong, I think it is an amazing card and can do some pretty broken things, but when I get to use the King of Gondor to smash face there was just no contest in who would be leading the deck. 

So lets take a look a the commander. Aragorn King of Gondor is a 4/4 with Vigilance and Life Link (it is also very appropriate given that Kings of Gondor have the power of healing). It’s a pretty good stat block for a commander and has some great key words that can pose a really threat. It has definitely made my opponents think twice about attacking into me when I have Aragorn on the battlefield. So he has a good stat block and some cool key words. However, the real meat of Aragorn’s power comes from his abilities and they come in two parts. 

First is When Aragorn, King of Gondor enters the battlefield, you become the monarch. This is a pretty cool ability, allowing for some extra card draw and it is nice and thematic for the LOTR’s lore.

Second is Whenever Aragorn attacks, up to one target creature can’t block this turn. If you are the monarch, creatures can’t block this turn. Now this ability is nuts! If you are the monarch and Aragorn attacks, you can pretty make sure that he doesn’t die due to powerful blockers and if you untap with Aragorn and the monarch you can swing out all of your creatures with no chance of them being blocked!

I have tried to keep the deck at LOTR themed as possible, but I have included some additions from outside of the set. Aswell as the Monarch, the deck also runs a human tribal sub theme and as such makes a lot of 1/1 and 2/2 tokens that can take advantage of Aragorns unblockable ability. Cards like Faramir Prince of Ithilien, Riders of the Mark, Prince Imrahil the Fair and Adeline, Resplendent Cathar are ideal for churning out tokens at a rapid pace.

In addition to this I need some cards that allow me to get the monarch back before my combat step so that I can maximise Aragorns ability and get my opponents out of nowhere. Court of Ire, Archon of Coronation and Champions of Minas Tirith are great for this.

I also included a few cards that protect me from taking damage in combat so that my opponents are not able to steal the Monarch from me. It is very frustrating to have a huge turn in mind, only to have it foiled by taking damage! The classic Ghostly Prison and Propaganda are brilliant pillowfort cards, however I have only included the two as I don’t want to be too stax heavy. Also Grand Abolisher is great for stopping my opponents from interacting with my plans.

Some stand out cards in this deck are Aurelia the Warleader, who is amazing when I need to take the Monarch from somebody and then swing out for an additional combat phase. She is also fantatic if I already have the Monarch and Aragorn of the field because she gives me two combat phases in which nothing can block! Another stand out has to be Odric, Lunarch Marshal which is an absolute power house. As Aragorn has so many key words, being able to grant these to my other creatures is fantastic.

And finally, my favourite card in the deck has to be Forth Eolingas! Nothing like a charge of the Rohirrim to round out a game.

Cut Off One Head and Two More Shall Rise – Adventures in Marvel Crisis Protocol

Yesterday I attended a MCP event run by our good friends Curtis and Grant of the Throwing Dice Podcast. It was so much fun and I feel like I am starting to get the hang of how the game plays and some of the nuances when facing different affiliations. I thought I would do a quick breakdown of my games, along with some of the lessons I learnt.

Game 1: Hydra vs Winter Guard

Crisis Cards: Hammers and Mayor Fisk

For my first game I played against Jon and his Winter Guard. This was a really fun game and I was able to utilise a sneaky play on turn one with the World Domination tactics card to gain an early advantage in VPs. I had the benefit of numbers too which came in handy, especially as Red Skull really performed – dazing Hela in one activation and just putting out damage consistently. We ran out of time to finish all the rounds but I was ahead on VPs when the game ended.

Game 2: Hydra vs Defenders

Crisis Cards: Montesi Formula and Mayor Fisk

My second game was against Curtis, one of the event organisers, and his Defenders list. Once again with priority and Mayor Fisk I was able to claim World Domination and the extra VP and power which came in handy, but overall I was unable to capitalise on the advantage and some great plays from Curtis (especially his combo of Elektra, ninjas and Daredevil) proved too sneaky and he held enough books to get a healthy advantage in victory points. Couple this with Wolverine just slicing Red Skull to bits and victory was Curtis!

Game 3: Hydra vs Web Warriors

Crisis Cards: Skrulls and Super-Powered Scoundrels

This game was really over before it started as I chose the wrong kind of list to go up against Cris’ super nimble and mobile Web Warriors. I took a taller list, including a Sleeper Agent Hulk, but lacked the mobility to catch the Web Warriors and stop them holding the Skrulls and running away with them. Additionally, Strucker’s leadership did not come into effect much as I wasn’t suffering damage so did not need the healing ability from handing out conditions. Still it was a fun game and one where I feel I learnt loads on how to play the game.

Game 4: Hydra vs Brotherhood of Evil Mutants

Crisis Cards: Skrulls and Gamma Wave

My final game was against Josh’s Magneto-led Brotherhoods list and boy was this a fun game! We both had loads of conditions to hand out, which mean Strucker was working hard to transfer them back to the mutants with his leadership ability. This also mean that Strucker was a priority target so looking back I should have worked to keep him better protected. That said, Sleeper Agent Hulk worked really well this game, his ability to shut off reactive superpowers and team tactics cards really hampered Josh’s counter-Hulk strategies. This super bloody game ended with a narrow victory for me which I was really happy about as it felt super back and forth all throughout.

Lessons Learnt

As all of my games were against affiliations that I had not faced before, it was interesting to see how differently they all played. From the Winter Guard getting up and close for a brawl to Web Warriors just running circles around me, it is important to seriously consider what your opponent’s game plan will be as much as your own game plan.

I ran Zola in all my games over the weekend and was underwhelmed by him each time. Maybe I am not playing particularly well with him, but his gainer is not that particularly impressive and his 2 physical defence really leaves him vulnerable. Perhaps he is better as a back board support character or maybe I should run next to some sort of bodyguard piece – I am welcome to suggestions on how to run him better!

Vrondiss just does things! When you know you know…

So I have done a couple of blog posts now about my decks and apparently I am just unable to stop writing them. I keep saying that my Miirym Sentinel Wyrm deck is my favourite but I think that is just a flat out lie. The first deck I ever had is a mega upgraded Vrondiss Rage of Ancients precon and I cannot even begin to describe the joy I get when I play this deck. 

It is a Gruul deck, so automatically you think of big haste creatures, but no! This is a Gruul deck that will blow your mind! It plays interaction like a blue deck and sacrifice payoff like a black deck, it is so indescribable that I am don’t even know how I am going to sum it up in one post. But as Yoda once said “do or do not there is no try” so screw it let’s give it a go.

The original deck list I had for my Vrondiss Deck was just big dragons and some dice rolling, seemed good but we all know where I ended up putting my dragons… looking at you Mirym! My Vrondiss deck is now a go wide token deck with a sacrifice sub theme relying on ETB triggers to do damage to my opponents and the possibility of going infinite in a weird and wonderful way.  By infinite I mean this deck can get infinite 5/4 dragon spirit tokens, infinite damage to my opponents or creatures on the battlefield, it can get infinite mana and it can draw my entire deck! What in the name of red and green is this!

What makes the infinite combo side of this deck even more crazy is that I run 0 tutors and each of the combos require a minimum of 5 cards to pull off. it sometimes happens and sometimes it doesn’t which makes pulling an crazy combo off even more exciting. 

So without going into every detail of the deck, here is a summary of the main strategy that I try and pull off along with some of the key cards that make this deck so fun to play.

The main idea is ramp out, play Vrondiss as quickly as possible and then drop cards like Vulshock Sorcerer, Cunning Sparkmage, Component Pouch, Chaos Dragon and Endbringer to ping or roll dice to trigger Vrondiss and make a tone of 5/4 dragon spirits.

Hopefully I will also have cards like Where Ancients Tread, Impact Tremors, Terror of the Peaks and Warstorm Surge to do damage to my opponents when the tokens enter the battlefield.

I also hope to play cards like Elemental Bond, Garruks Uprising and Tribute to the World Tree to draw me cards every time one of my 5/4 spirits comes into play. With the amount I can trigger Vrondiss this can get pretty nuts, quite quickly.

Cards like Anara Wolvid Familiar, Tamiyo’s Safekeeping and Withstand Death can be used to make Vrondiss indestructible, which with the right cards in play can make crazy amounts of tokens as I can ping him for damage without worrying about him dying.

Then we get onto the bonkers cards. Phyrexian Altar, Greater Good and Goblin Bombardment let me sacrifice my many many tokens for either mana, damage or cards which is crazy! The value that can come out of these cards can straight up win the game with the right board state.

Oh wait my commander is dead… no problem! I have included Ripjaw Raptor, Polyraptor, Hornet Nest and Needletooth Raptor which can be pinged with damage, giving me even more crazy stuff.

Stand out cards in this deck are Brash Taunter, which is just such a pain. If I block with him he doesn’t die and I can have him fight Vrondiss to get 5/4’s. Fiendlash is crazy when it is attached to Vrondiss as whenever I ping him for damage I get to sling 7 damage at someone’s face.

There are so many cool cards and interactions in this deck that I cannot name them all. Check the deck out for yourselves and see if you fall in love with it as much as I have. Click here to give it a look.